> ## Documentation Index
> Fetch the complete documentation index at: https://docs.retellai.com/llms.txt
> Use this file to discover all available pages before exploring further.
# Conversation flow agents: structured voice AI call control
> Build structured Retell voice agents with conversation flow — nodes for dialogue, tools, transfers, code, and transitions for precise call control.
## What is a Conversation Flow Agent?
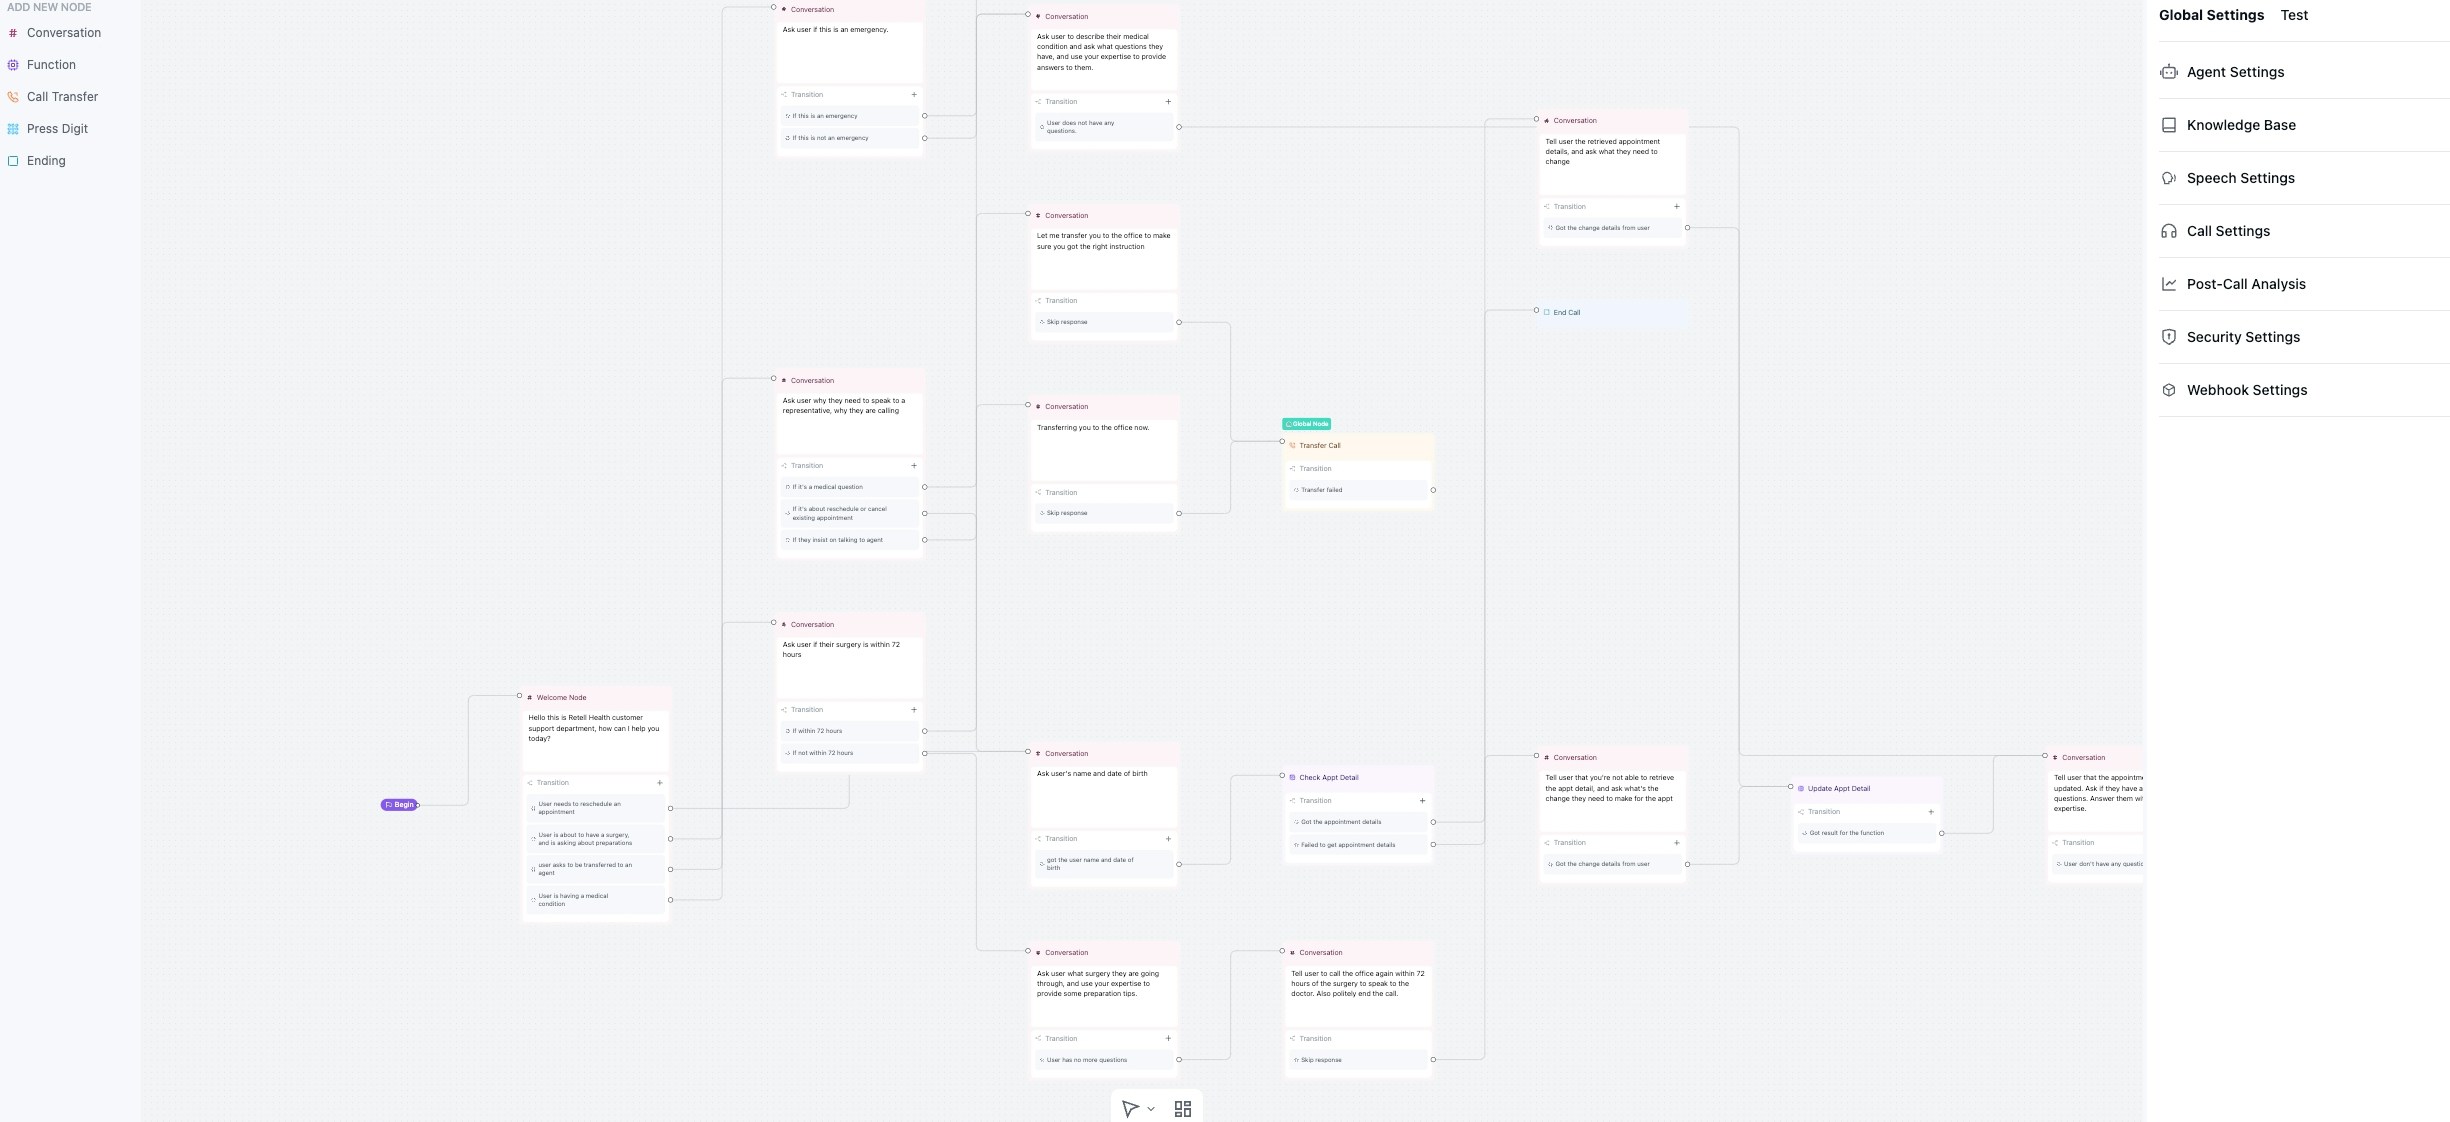
Conversation flow agents divide a task into nodes, each with its own instructions or actions. You connect the nodes and define the conditions for moving between them.
This gives you more control over execution and lets you limit the instructions and tools available at each point. It also introduces node boundaries that can make conversations harder to handle when callers give information early or change their minds. For your first version, we recommend starting with a single prompt agent unless you need the additional structure; see [when to use single prompt vs. conversation flow agents](/build/choose-agent-type).
Before building, read the [conversation flow best practices](/build/conversation-flow/best-practices) for guidance on prompts, transitions, and node boundaries.
 ## Components
* **Global settings**: Configuration that applies to the entire conversation, including:
* Global prompt and personality
* Default voice and language settings
* Agent-wide parameters and behaviors
* **[Node](/build/conversation-flow/node)**: The basic unit of conversation flow. Multiple node types are available:
* Conversation nodes for dialogue without tool calling
* Subagent nodes for dialogue with tool calling
* Function nodes for deterministic API and tool execution
* Logic nodes for branching
* End nodes for call termination
* **[Edge](/build/conversation-flow/transition-condition)**: Connections between nodes that define transition logic:
* Condition-based transitions
* Default fallback paths
* Dynamic routing based on conversation context
* **Tools / Functions**: Reusable capabilities that can be attached to subagent nodes or invoked from function nodes. Conversation nodes do not use tools / functions:
* Custom API integrations
* Built-in utilities (calendar, SMS, transfers)
* External service connections
## How it Works
The active node determines which instructions or actions the agent uses. Its outgoing [transition conditions](/build/conversation-flow/transition-condition) determine where the agent can go next. A node can handle multiple conversation turns, so you do not need a separate node for each question. [Subagent nodes](/build/conversation-flow/subagent-node) can also call tools during the conversation.
## Navigating between agents and subflows
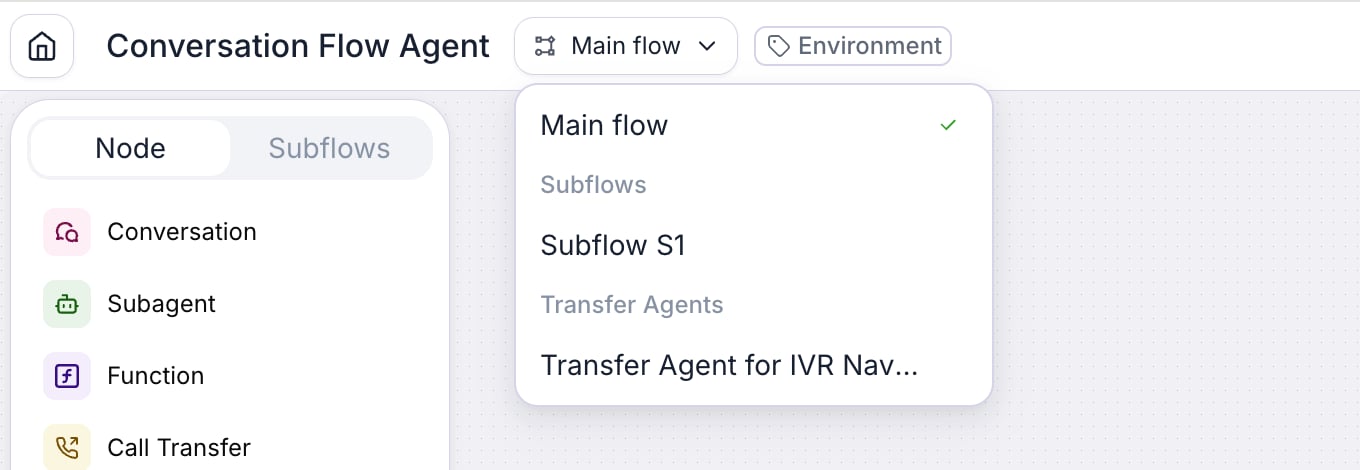
The builder has a **selector** at the top (it shows **Main flow** by default). Use it to move between everything you have open — each opens in its own tab:
* **Agents**: your main agent (**Main flow**) and any **transfer agents** you open from an [agentic warm transfer](/build/conversation-flow/call-transfer-node).
* **Subflows**: any [subflows](/build/conversation-flow/components) you open for editing.
You can return to **Main flow** at any time.
## Components
* **Global settings**: Configuration that applies to the entire conversation, including:
* Global prompt and personality
* Default voice and language settings
* Agent-wide parameters and behaviors
* **[Node](/build/conversation-flow/node)**: The basic unit of conversation flow. Multiple node types are available:
* Conversation nodes for dialogue without tool calling
* Subagent nodes for dialogue with tool calling
* Function nodes for deterministic API and tool execution
* Logic nodes for branching
* End nodes for call termination
* **[Edge](/build/conversation-flow/transition-condition)**: Connections between nodes that define transition logic:
* Condition-based transitions
* Default fallback paths
* Dynamic routing based on conversation context
* **Tools / Functions**: Reusable capabilities that can be attached to subagent nodes or invoked from function nodes. Conversation nodes do not use tools / functions:
* Custom API integrations
* Built-in utilities (calendar, SMS, transfers)
* External service connections
## How it Works
The active node determines which instructions or actions the agent uses. Its outgoing [transition conditions](/build/conversation-flow/transition-condition) determine where the agent can go next. A node can handle multiple conversation turns, so you do not need a separate node for each question. [Subagent nodes](/build/conversation-flow/subagent-node) can also call tools during the conversation.
## Navigating between agents and subflows
The builder has a **selector** at the top (it shows **Main flow** by default). Use it to move between everything you have open — each opens in its own tab:
* **Agents**: your main agent (**Main flow**) and any **transfer agents** you open from an [agentic warm transfer](/build/conversation-flow/call-transfer-node).
* **Subflows**: any [subflows](/build/conversation-flow/components) you open for editing.
You can return to **Main flow** at any time.
 ## Quickstart
Head to the Dashboard, create a new conversation flow agent and select a pre-built template to get started. You can view all options available to the agent within the Dashboard, with details of the options and any latency implications listed there. You can also view the estimated latency and cost of the agent. Modify the template to your needs; all changes are auto-saved.
## Reusing a flow across multiple agents
A conversation flow is a standalone resource — identified by a `conversation_flow_id` — that an agent references through its `response_engine`. The same flow can be linked to multiple agents, so you can share a single flow across, for example, a staging agent and a production agent, or across multiple language or channel variants.
* In the dashboard, create the flow once, then create or edit each agent and select the existing flow as the agent's response engine.
* Via API, set the same `response_engine.conversation_flow_id` on each agent when calling [Create Agent](/api-references/create-agent) or [Update Agent](/api-references/update-agent).
* Updates to the flow apply to every agent that references it, so publish changes carefully and test in a non-production agent first.
Agent-level settings (voice, language, webhook URL, data storage, Post Call Extraction, etc.) stay on the agent, so two agents sharing a flow can still differ in those areas.
## Pricing
Since the choice of model can be overridden within individual nodes, the pricing for each call is calculated based on:
* Time spent in each node (seconds)
* Model price per second for that specific node
* Total aggregated across all nodes visited during the call
This allows you to optimize costs by using different models for different parts of the conversation (e.g., cheaper models for simple routing, premium models for complex interactions).
This documentation is built and hosted on [Mintlify](https://mintlify.com), a developer documentation platform.
## Quickstart
Head to the Dashboard, create a new conversation flow agent and select a pre-built template to get started. You can view all options available to the agent within the Dashboard, with details of the options and any latency implications listed there. You can also view the estimated latency and cost of the agent. Modify the template to your needs; all changes are auto-saved.
## Reusing a flow across multiple agents
A conversation flow is a standalone resource — identified by a `conversation_flow_id` — that an agent references through its `response_engine`. The same flow can be linked to multiple agents, so you can share a single flow across, for example, a staging agent and a production agent, or across multiple language or channel variants.
* In the dashboard, create the flow once, then create or edit each agent and select the existing flow as the agent's response engine.
* Via API, set the same `response_engine.conversation_flow_id` on each agent when calling [Create Agent](/api-references/create-agent) or [Update Agent](/api-references/update-agent).
* Updates to the flow apply to every agent that references it, so publish changes carefully and test in a non-production agent first.
Agent-level settings (voice, language, webhook URL, data storage, Post Call Extraction, etc.) stay on the agent, so two agents sharing a flow can still differ in those areas.
## Pricing
Since the choice of model can be overridden within individual nodes, the pricing for each call is calculated based on:
* Time spent in each node (seconds)
* Model price per second for that specific node
* Total aggregated across all nodes visited during the call
This allows you to optimize costs by using different models for different parts of the conversation (e.g., cheaper models for simple routing, premium models for complex interactions).
This documentation is built and hosted on [Mintlify](https://mintlify.com), a developer documentation platform.