

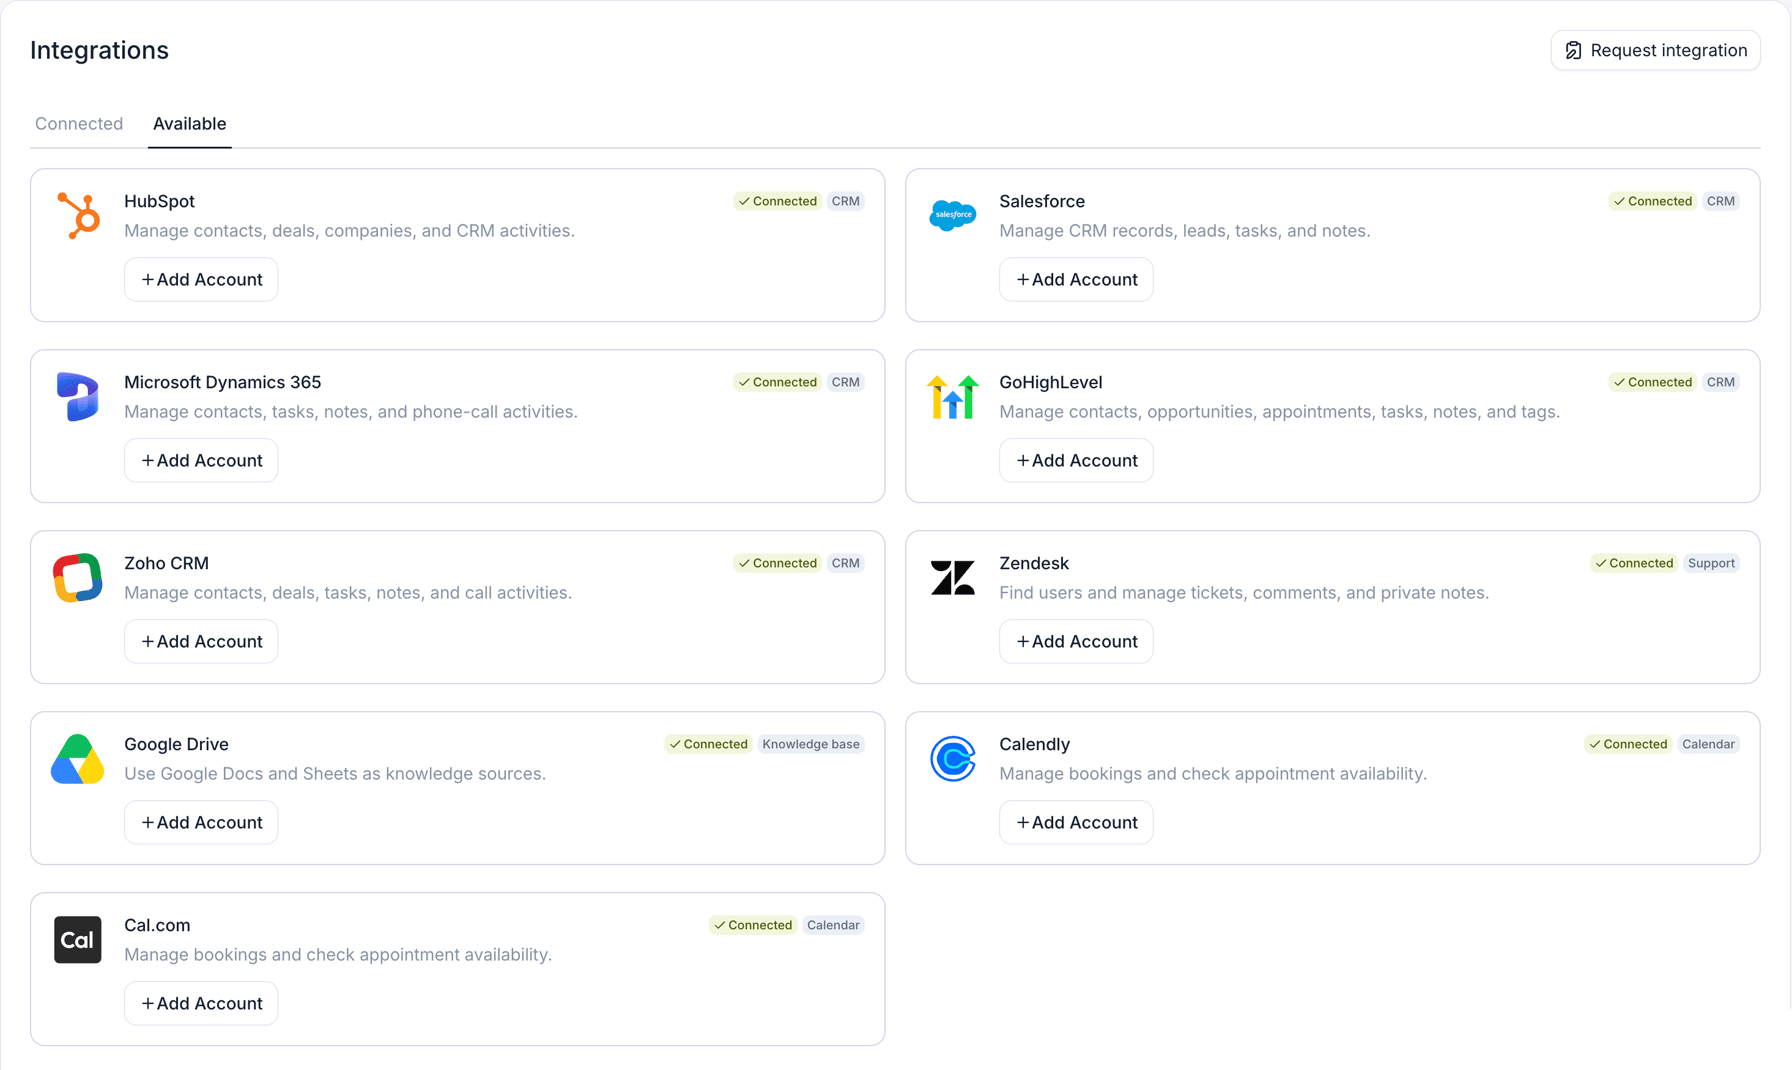
Examples of provider cards on the Integrations page's Available tab.
What does an integration give you?
- Integration tools. Every provider except Google Drive, Microsoft OneDrive, and Notion adds tools your agent can call before, during, or after a call or chat: search a contact by the caller’s number, check calendar availability, book an appointment, create a support ticket. See use integration tools in an agent and agent workflow.
- Contact sync and activity logging (CRM providers). Import CRM contacts into Retell, write Post Call Extraction results back to contact fields, and log each conversation to the CRM. CRM integrations covers this in full.
- Knowledge base sources (Google Drive, Microsoft OneDrive, Notion). Sync files or pages from a connected account into a knowledge base so your agent answers from their content, and re-syncs them as they change.
Supported providers
Connect a provider
Open the Integrations page
Connect and authenticate
Verify the connection
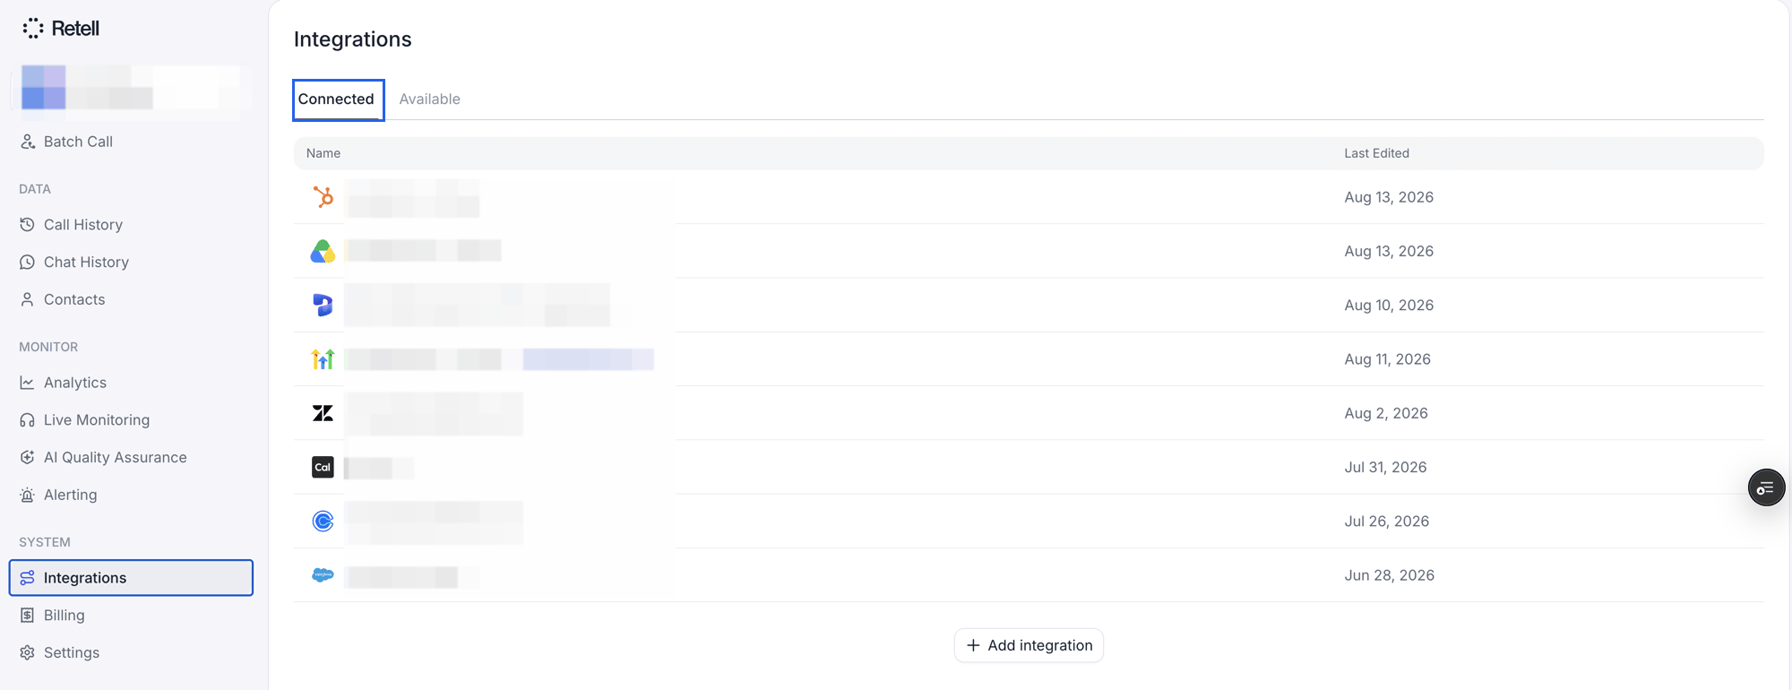
The Connected tab, listing each connection with its provider and when it was last edited.
Use integration tools in an agent
Once a provider is connected, its tools show up when you add a function to an agent, whether in a prompt agent’s Functions section or a conversation flow’s function node; see integration tools for prompt agents and integration tools in conversation flow for each surface. Each configured tool is bound to one specific connection, so if you connect two HubSpot accounts, you choose which one the tool uses.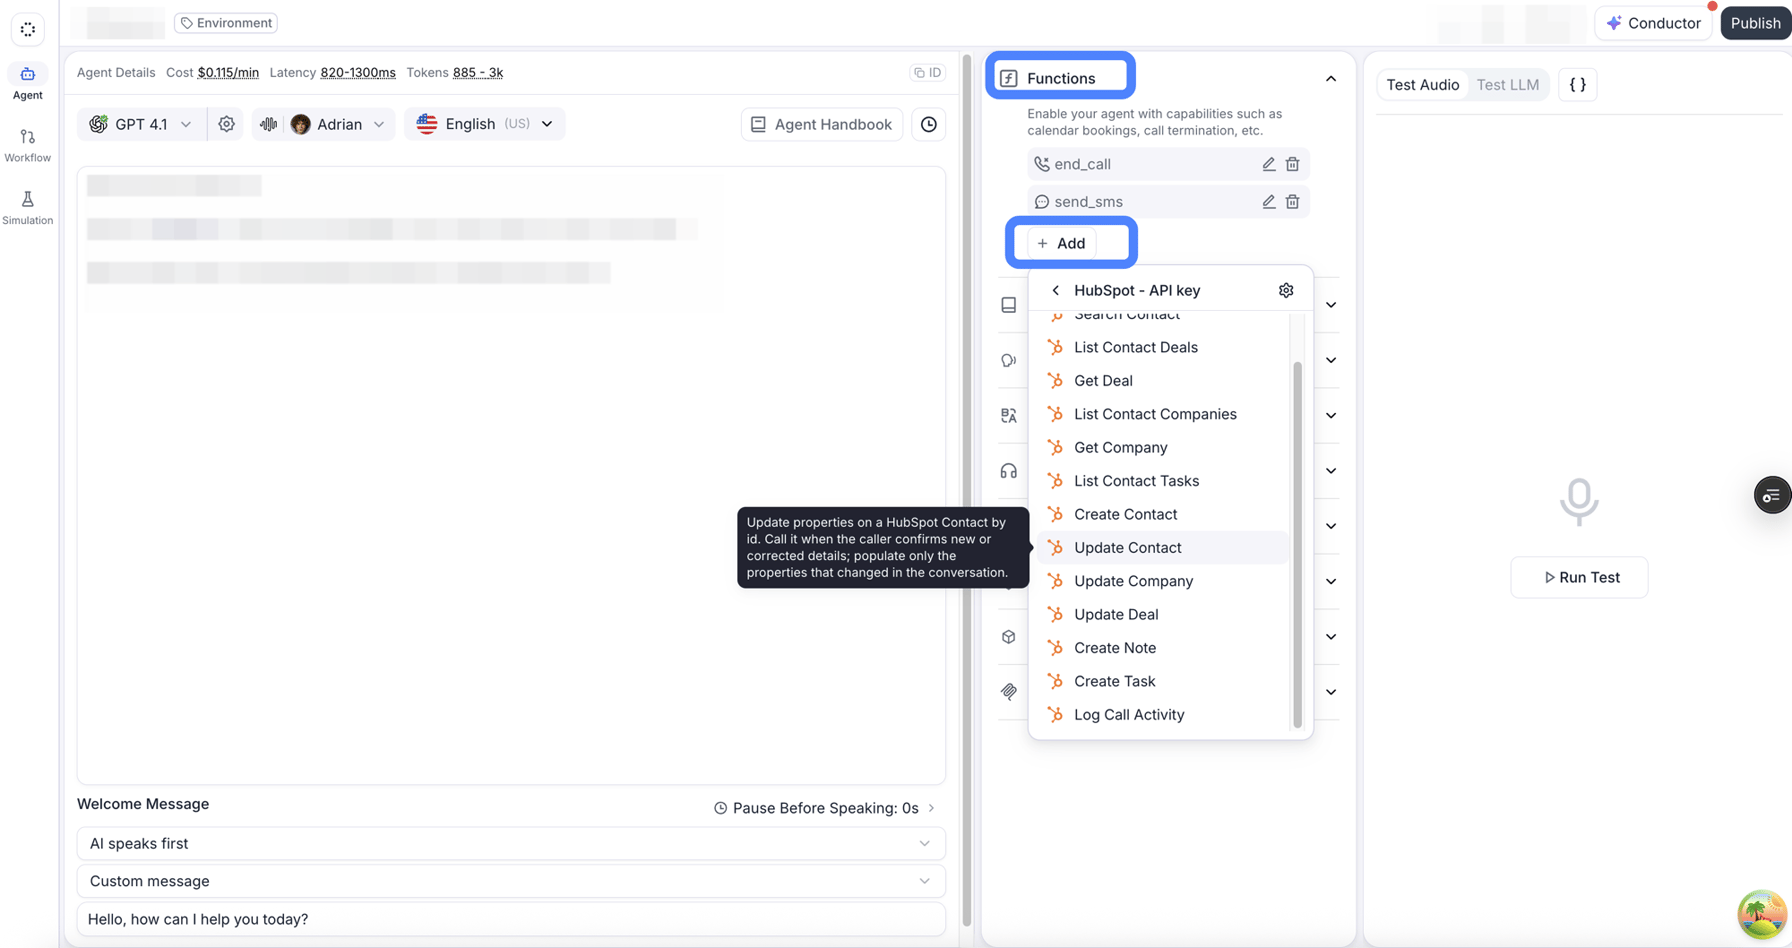
Adding a HubSpot tool to a single prompt agent's Functions section.
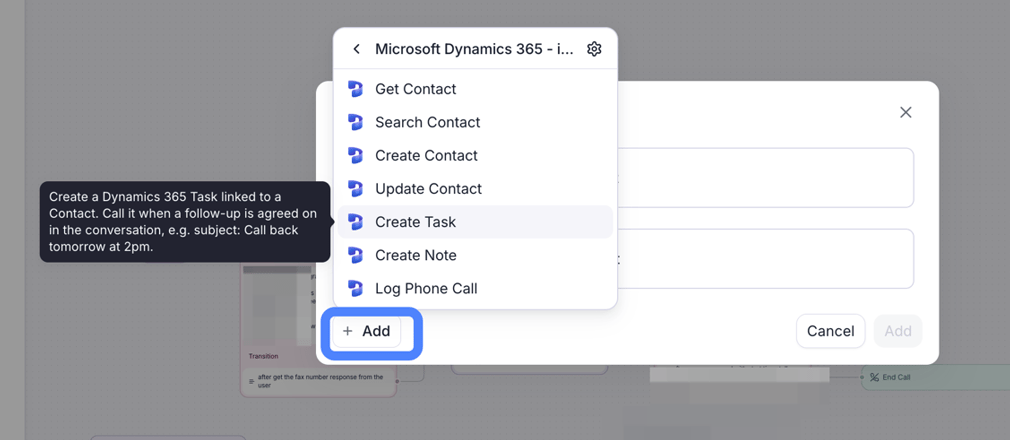
The same menu in a conversation flow's function node, here on a Microsoft Dynamics 365 connection.
Configure a tool’s inputs and outputs
Every tool config carries a Name, a Description that tells the LLM when to call it, and a Function fields card with an Input tab and an Output tab. On the Input tab, open the mode selector beside a field to choose where its value comes from. When the field displays AI will infer, you can click anywhere in that value area to open the menu.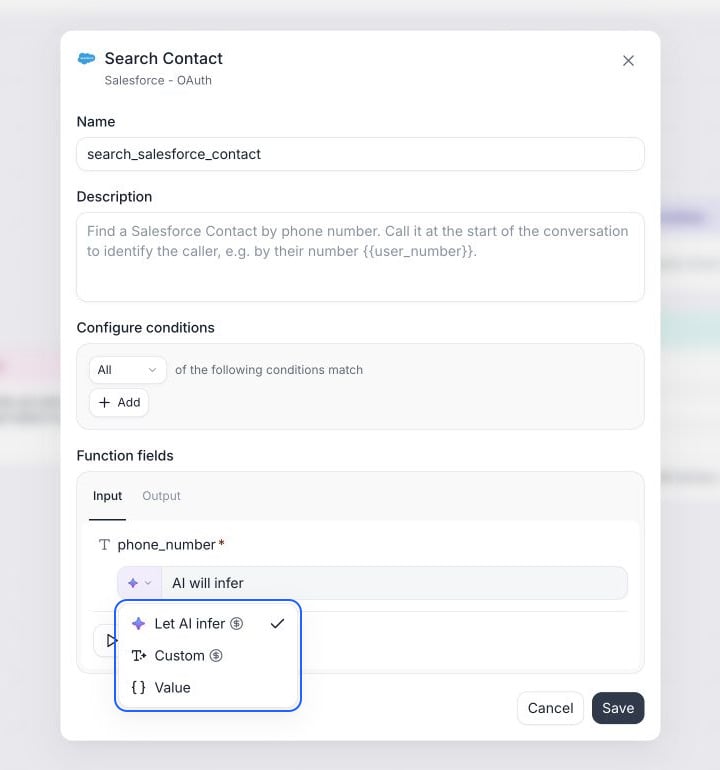
The input mode menu separates Let AI infer, Custom, and Value.
{{user_number}} to look up the calling number. If callers may use a different number for their account, choose Custom and enter: “Use the phone number the caller confirms for their account, including the country code.”
Edit a custom prompt directly in the field, then click Save in the tool dialog to keep the configuration. To discard your custom instructions and use the provider’s guidance again, select Let AI infer. The Use AI prompt undo button restores the guidance inside the custom editor while keeping Custom selected. Saving an empty custom prompt also falls back to built-in guidance when available.
Configure typed inputs
The provider defines each field’s type. Changing its input mode changes how you supply a value, not the type the provider receives. Required fields have an asterisk; Add input lets you include optional fields.{{customer_email}} instead of a literal. Fields that require a fixed literal, such as Google Calendar’s calendar_id, don’t accept variables. Before saving, resolve invalid values and missing required fields; hover over a disabled Save button to see the reason.
Configure array inputs
Choose an array mode based on whether you already know the entries or want the agent to collect them. For example, Google Calendar’s Book Event takes anattendees array, with an email and optional name for each person.
Supply a fixed list with Array items
Choose Array items, then use the + beside the array name to add entries. Object entries are numbered[0], [1], and so on. Fill each entry’s required fields and use its trash button to remove the entry. Fields inside these rows take values, rather than AI instructions; where supported, you can use dynamic variables.
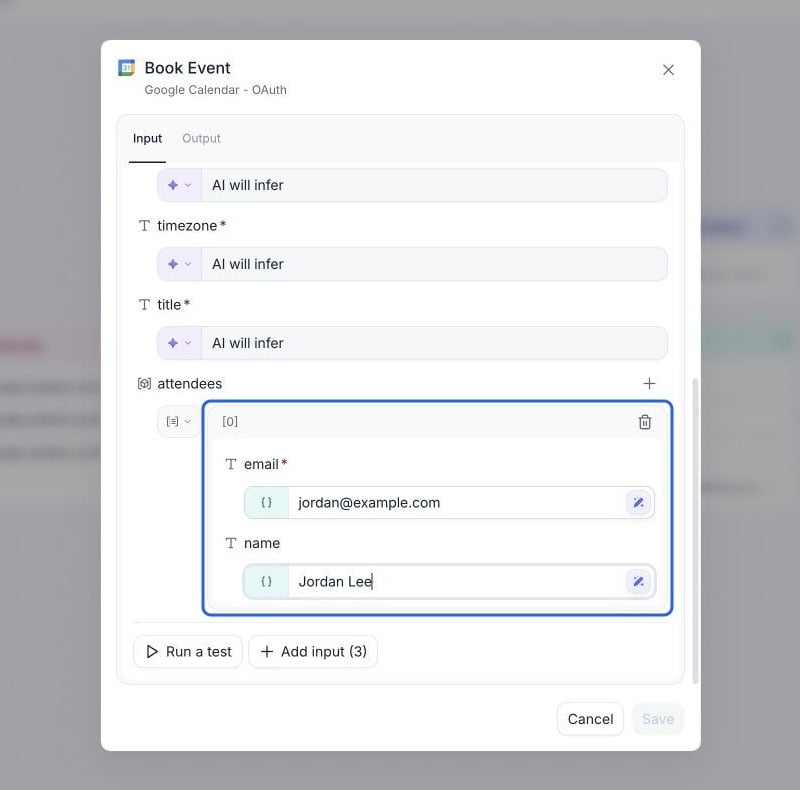
Array items supplies a concrete attendee list, shown here with synthetic contact details.
{{customer_email}} when an earlier function already collected it. Use a number or Boolean control for those item types, and configure nested objects or arrays within their parent entry when the provider supplies that structure.
Blank rows are omitted from the request. A previously saved whole-array variable or explicit empty array ([]) can reopen in Value mode so its value is preserved, even when a new array normally offers Array items instead.
Let the agent build the list
Choose Let AI infer to use the provider’s guidance for the entire array. For an array of objects, choose Custom to write an instruction for the list and configure the fields under Every item. If the provider has no built-in guidance, this mode is called Description. The array instruction tells the agent which entries to include. Every item defines how each entry is filled: use Description for a field the agent should collect, or Const for a value shared by every entry. Enum and Boolean fields retain their Select and Boolean controls. A constant here applies to every generated entry; it doesn’t add a separate fixed entry to the list.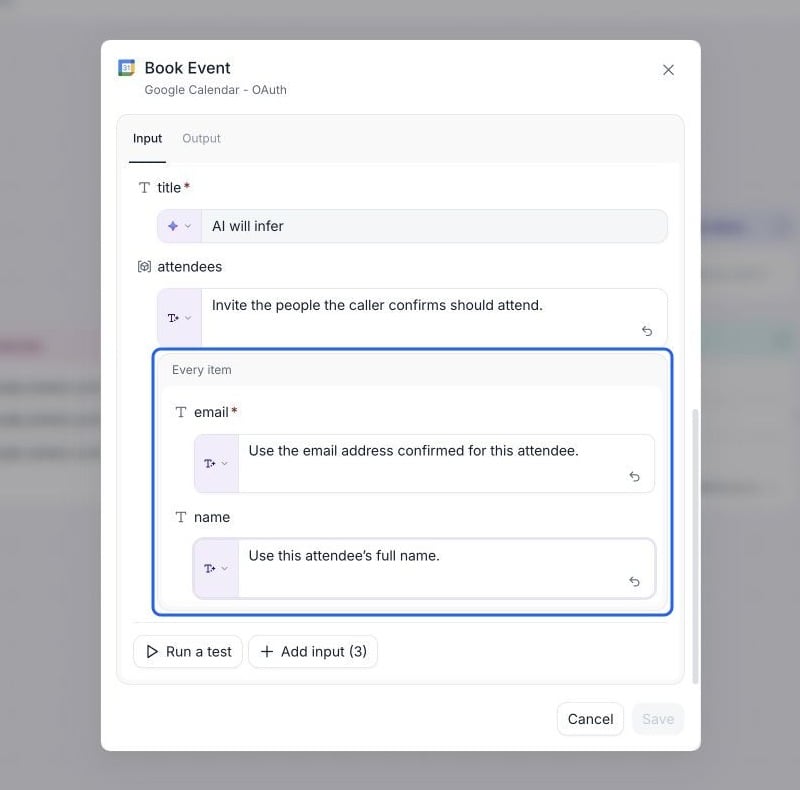
Every item applies the same field instructions to each attendee the agent collects.
email to Description with “Use the email address confirmed for this attendee,” and name to “Use this attendee’s full name.”
Switch back to Let AI infer to use whole-array inference without the Every item rules. These AI modes appear only where the function supports inferred inputs; pre-call and pre-chat integration inputs use values instead.
Run a test to get a tool’s output fields
The Output tab decides what the response gives back: which fields the agent sees, and which become dynamic variables. Most providers ship a response schema, so the field picker is already populated. Run a test when a tool has no schema, or when you want the real field names and values in front of you.Run a test
{{variable}} references. A test resolves variables in the tool’s pinned inputs, but not in the values you type into the test panel.Inputs set to Let AI infer, Custom, or Description start blank in the test panel. Enter sample values yourself; this test checks the provider request with those values. Use an agent test to check how the agent fills them from a conversation.For arrays, use the + beside the array name to enter concrete sample rows. In Every item mode, configured constants prefill the corresponding fields, while fields with AI instructions need sample values. Fill required fields in each added row, including nested entries. The test doesn’t run your field instructions to generate an array.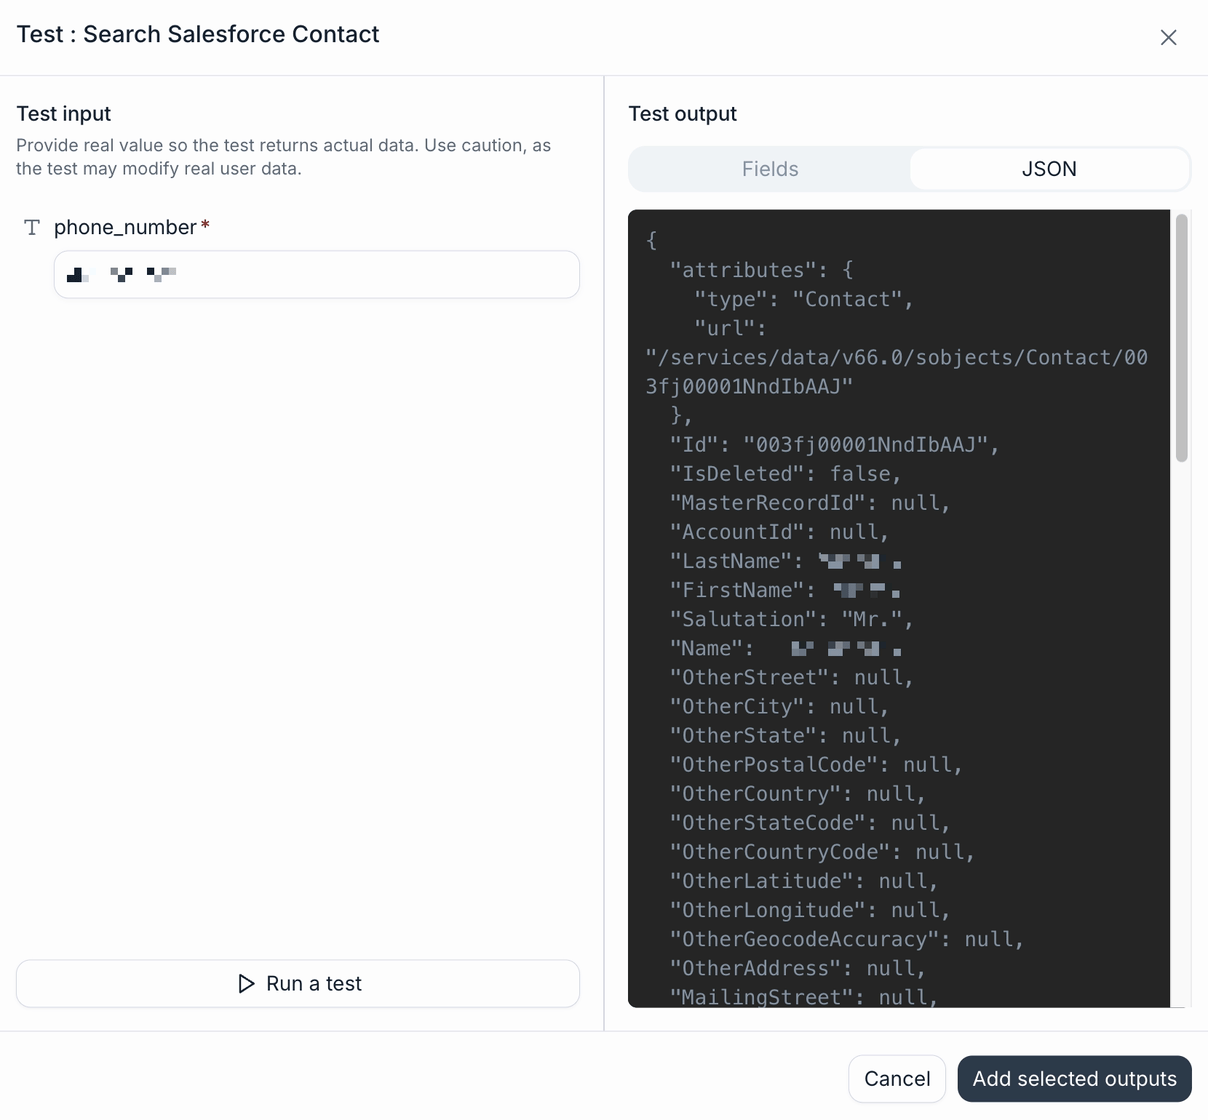
The test panel for a Search Salesforce Contact function, on the JSON tab after a run.
Pick the fields the agent should see
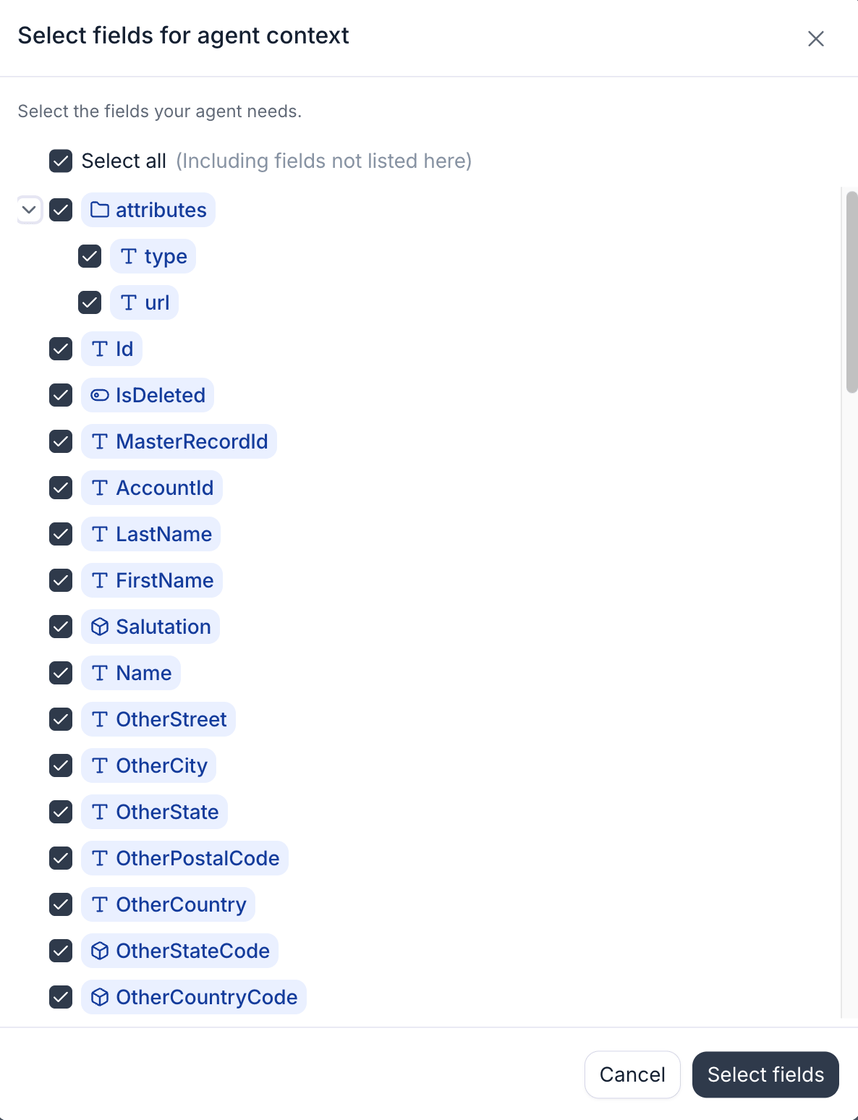
The Select fields dialog, with the whole Salesforce Contact response checked.
deals.properties.amount keeps that field on all of them), while deals[0].id keeps only the first.Name the ones you need as variables
Track execution status
In a tool’s Function fields → Output tab, the fixed Success status row stores whether the tool call succeeded. Enter a Dynamic variable name such ascontact_lookup_status, then save. Use a name without {{ }} that differs from your response-variable names. Leave it blank if you don’t need to store status; no test run or field selection is required to configure it.
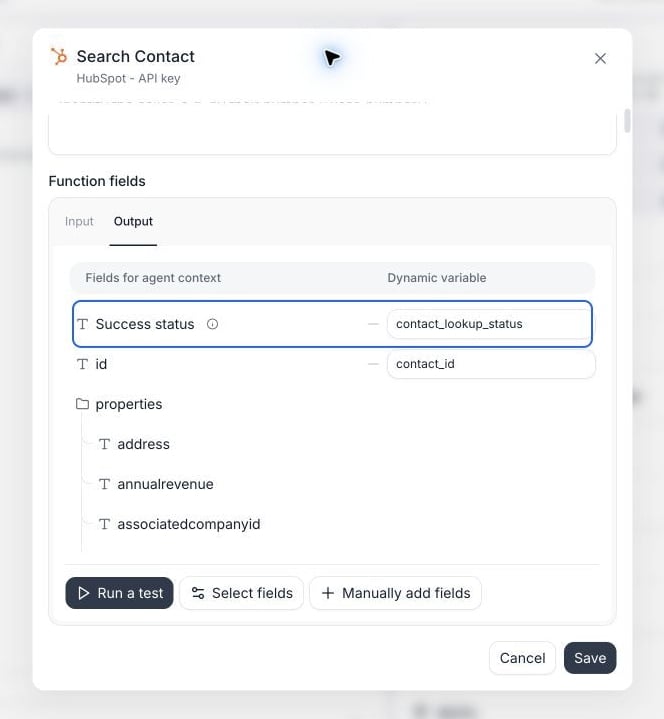
Save the integration's execution status separately from the returned contact ID.
success or failure after execution, including failures that produce no response fields. A successful lookup can still return no matching contact; check the returned data separately. If a condition or dependency skips the tool, the status variable keeps its previous value.
In a conversation flow, select Wait for completion and branch on the status. The API setting is execution_status_variable, separate from response_variables and the fields selected for agent context.
Run tools before or after the call or chat
Tools can also run outside the conversation. On the agent’s Workflow page, add them as pre-call functions, which run before the call starts so the agent has context before it speaks, or as post-call functions, which run after the call ends to update your systems. Chat agents have the same two slots, named pre-chat and post-chat functions. Each slot is a dependency graph rather than a list: functions with no dependency all start at once, and a function you add as sequential waits for the one above it and can use its output through a dynamic variable. Post-conversation functions can also be gated on a condition, so a follow-up task is created only when the session earned one. Agent workflow covers the whole surface: chaining, conditions, timing budgets, failure behavior, and worked examples for both voice and chat.FAQ
Can I connect more than one account for the same provider?
Can I connect more than one account for the same provider?
Do I need contact sync to use CRM integration tools?
Do I need contact sync to use CRM integration tools?
What happens if a tool call fails mid-conversation?
What happens if a tool call fails mid-conversation?
How do I know a connection is healthy?
How do I know a connection is healthy?